MYSQL -1
MYSQL
Introduction & Installation
Introduction
to MySQL,
Link
|
MySQL एक RDBMS (Relational Database Management System) है जो कि fast , reliable , flexible and use करने में बहुत ही easy है । MySQL के latest version 8.0.22 है , जो कि 19 Oct 2020 को release किया गया था। MySQL के latest version 8.0.22 है , जो कि 19 Oct 2020 को release किया गया था। MySQL कई सारी Programming Language
जैसे PHP
, PERL , C , C++ , JAVA etc. के Languages के साथ आसानी से use किया जा सकता है। MySQL से web-based software
applications भी
बना सकते हैं । MySQL कई
सारे Operating Systems पर काम कर सकता है। MySQL History MySQL को सन 1994 में एक Swedish Company MySQL
AB ने
develop किया
था । Sun Micro systems ने 2008 में MySQL AB का अधिग्रहण किया और MySQL को Sun Micro systems ने 2010 को Oracle Corporation से बेच दिया था । MySQL को David Axmark , Allan
Larsson and Michael "Monty" Widenius ने develop किया था । इसका पहला version
23 May 1995 में
हुआ था । और शुरुआत में यह सिर्फ personal use के लिए बनाया गया था जो कि low-level
language ISAM था
। Need Of MySQL MySQL एक Open Source RDBMS ( Relational
Database Management System ) Software है जो Digital Data store और Manage करने के लिए use किया जाता है । MySQL का use का सारी programming
languages like : PHP , Java , Python , PERL , .NET के साथ use करके Web and Desktop Application
में भी किया
जाता है। MySQL Advantages
MySQL
multi-threading सहयोग
करता है जो की easily scalable है। Data संभालता है 50 million rows और उससे ज़्यादा । Default
File Size about 4 GB,जो
की increase करके
8 TB of data भी
हो सकता है ।
MySQL
use करने
में बहुत आसान हैं । We have to get only the Basic knowledge of SQL
(Structured Query Language ) . We can build and interact with MySQL by using
only a few simple SQL statements.
MySQL
बहुत fast,
reliable है
, because of its unique storage engine architecture. यह Performance में काफी अच्छा result देता है in comparison to
other Databases without losing an important functionality of the Software.
MySQL
free of cost है
, इसे
application में
उसे करने या सीखने के लिए हमें कोई Pay नहीं करना पड़ता है। MySQL की Official Website पर जाकर , download करके इसे use कर सकते हैं। |
Installing MySQL - MySQL Installation, windows installation
|
MySQL सबसे popular relational database management software है , आज के समय में बहुत ही ज्यादा use किया जाता है। यह एक से ज़्यादा users access support करता है। इस section में हम सिखेंगे , MySQL download and install कैसे करे - Requirements MySQL install करने के लिए आपके system में दिए गए requirements होने ही चाहिए - 1. CPU: Intel
Core or Xeon 3GHz (or Dual Core 2GHz) or equal AMD CPU 2. Cores: Single
(Dual/Quad Core is recommended) 3. RAM: 4 to 6
GB. 4. Graphic
Accelerators: nVidia or ATI with support of OpenGL 1.5 or higher 5. Display
Resolution: 1280×1024 is recommended, 1024×768 is minimum. Install MySQL
On Windows 1. 1. MySQL setup को download करने के लिए 2 options दिए गए है , MySQL
community server के लिए Version number choose करे,जो आपको चाहिए ।
अगर internet
connectivity अच्छी
है तो ,
mysql-installer-web-community choose करें। Otherwise, दूसरा choose करें। 2. 2. MySQL के official website पर जाए https://dev.mysql.com/downloads/installer
और
download
करे
community
server edition software.यहाँ option में choose करे Operating
System as , Windows. 3. 3. Download करने के बाद setup को कही भी unzip करे and double
click करे
MSI
installer .exe file. ऐसी screen
दिखेगी।  4. 4. Different
options में
से Setup
Type select करे
,
appropriate option to install MySQL product and features.यहाँ हम full option
select करेंगे
and
Next button click करे। 5. 5. यह option कई चीजों को set करेगा like : MySQL
Server, MySQL Shell, MySQL Router, MySQL Workbench, MySQL Connectors,
documentation, samples and examples, and many more. 6. 6. जैसे ही हम Next button
click करेंगे
,
कुछ
information
show होगी
due
to a lack of system requirements. या तो इन requirements को download करें या skip करके Next button पर click करे. 7. 7. next wizard में आप एक dialog box देखेंगे जो एक message show करेगा - few products
not getting installed . Click on the Yes button. 8. 8. Yes button पर click करने के बाद , products
list दिखेगी
जो हमको installed
करनी
है . So,
अगर
सारे products
चाहिए
तो Execute
button पर
click
करें।  9. 9. जैसे हि Execute button
पर
click
करेंगे
,
तो
सारे products
को
download
and install करेगा।
Installation
करने
के बाद Next
button पर
click
करे। 10. 10. next step, हमें MySQL Server
and Route को
configure
करने
की आवश्यकता है। हालाँकि MySQL के साथ Router use करने की कोई
आवश्यकता नहीं है। 11. 11. Next screen देखे निचे कि , यहाँ हमको MySQL Server
arrange करना
है। अब Standalone
MySQL Server/Classic MySQL Replication option चुने , and click
Next. 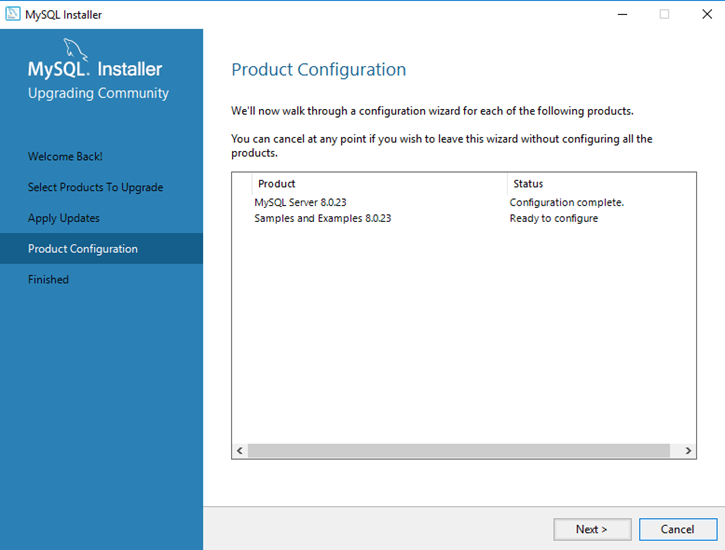 12. 12. अब system Config
Type and other connectivity options पूछेगा, यहाँ Config Type as
'Development Machine' and Connectivity as TCP/IP, and Port Number is 3306
select करना
है then click Next. 13. 13. अब ,
Authentication Method select करें and click Next. 14. 14. Next आपको MySQL Root
Password पूछेगा
Password
details भरने
के बाद ,
click Next button. 15. 15. Next अगर आप Server Configuration
करना
चाहते हैं तो configure
कर
सकते हैं,
Configuration complete हो जाने के बाद Default
setting रखें
और फिर complete
the MySQL package installation बटन पर click करें। |
Linux RPM
Installation,
|
RPM
command is used for installing, uninstalling, upgrading, querying, listing,
and checking RPM packages on your Linux system. RPM
stands for Red Hat Package Manager. (-----------------hindi_______________-----) With
root privilege, you can use the rpm command with appropriate options to
manage the RPM software packages. (--hindi--) 1.
Installing a RPM package Using rpm -ivh RPM
filename has package name, version, and release and architecture name. For example,
In the MySQL-client-3.23.57-1.i386.rpm
file: ·
MySQL-client – Package Name ·
3.23.57 – Version ·
1 – Release ·
i386 – Architecture When you
install a RPM, it checks whether your system is
suitable for the software the RPM package contains, figures out where
to install the files located inside the rpm package, installs them on your
system, and adds that piece of software into its database of installed RPM
packages. (-hindi-) The
following rpm command installs Mysql client package.
rpm command
and options -i : install a
package -v : verbose -h : print hash
marks as the package archive is unpacked. You can
also use dpkg on Debian, pkgadd on Solaris, depot on HP-UX to install packages. 2. Query
all the RPM Packages using rpm -qa
You can use rpm command to query all the packages installed in your system.
§ -q
query operation § -a
queries all installed packages |
Linux Binary
Installation, -Source Installation
Starting and
stopping MySQL –
|
Let us understand how MySQL server can be started and stopped on
Linux and Windows – Linux – Start and Stop Server
On
Linux, the start and stop can be done from the command line as shown below − /etc/init.d/mysqld start/etc/init.d/mysqld stop/etc/init.d/mysqld restart
Linux – Service Commands
Some
Linux types offer service command as well − service mysqld startservice mysqld stopservice mysqld restart
(or)
service mysql startservice mysql stopservice mysql restart
Windows – Start and Stop Server
Let
us understand how it can be done on Windows − ·
Open ‘Run’ Window by using Win key + R ·
Type ‘services.msc’ ·
Now search for MySQL service based on the version that is
installed. ·
Click on ‘stop’, ‘start’ or ‘restart’ the service option. Otherwise,
the user can start/stop MySQL from the command prompt. It can be done as
shown below − C:\> "C:\Program Files\MySQL\MySQL Server 8.0\bin\mysqld"C:\> "C:\Program Files\MySQL\MySQL Server 8.0\bin\mysqladmin" −u root shutdown
|

Comments
Post a Comment